Image Map

Sunday, January 16, 2011

Barney, The Big Purple Dresser...

I know, terrible title.  I couldn't resist.  This was my second project I ever did.  Hence, no before pictures!  I didn't have a blog back when I did this and didn't think I would need any pictures.  The before looked similar to the other purple dresser I did.


It is VERY difficult for me to get a good picture of this dresser.  In some photos, like the one above, it looks like it has a pinkish hue.  In other photos it looks almost burgendy.  This is one that definately looks better in person.


I love the handles on this piece.  They absolutely make this dresser!

**I edited this post to add a picture of the dresser at night.  You can see the slight change in color depending on the lighting.***


I lined the drawers with this pretty fabric I got at Hobby Lobby.  I love the way it looks, but will probably never do that again!  I think next time I'll just use scrap booking paper.


This is one of my favorite pieces.  I got this bowl in Costa Rica while the hubby and I were on a very belated honeymoon!  I made the little moss balls myself with materials from hobby lobby.  I think I spent about $8 and still have half the materials in my crafting closet.


This is probably my second favorite piece!  I got it on clearance for about $1 at World Market.  I LOVE that store!


This is my father-in-law's lamp from when he was a little boy.  He and his family used to use it for light on the way to the outhouse!  He gave it to me after he found out I purchased an old lantern at a yard sale.


I absolutely ADORE the old funky colors on it.  I couldn't replicate this if I tried! Sometimes the original color is the best color!

Mom's barstools are taking a little longer than expected.  I'll  be putting many more coats of paint on today, so I won't be able to finish them until next weekend!


In the meantime, here is a sneak peek at a little crafting project I've been working on! Any ideas of what I'm making?!

Cheers!

Saturday, January 15, 2011

My Very First Project!


While I'm working on Mom's barstools I'll keep the eye candy coming with my very first project ever!  I started my grad program in May 2010.  I knew I would be studying all the time, so I wanted a cute and functional desk to work at.  It didn't take long for me to find a desk I loved on Craigslist.  Here she is:


The woman I bought it from said she used it while she was in college.  Judging from her age I'd say this desk was at least 30 years old.  It looked like someone had painted it red and put a faux glaze on it.  Here were the handles.  Gross!


I have a white corner desk I bought from Pottery Barn (these were the days before I knew about repurposing furniture).  I wanted my student desk to match, so I wanted white with black handles.  I had to put about three coats of primer on this desk to coat the red.  Then about two or three more coats of white semi-gloss paint.  I decided to paint the entire drawer too because they had spilled ink and other messes inside of them.  Here she is all made over!


You can tell I like bright colors.  I made my office/study very bright so I could stay awake and be happy while studying.


I love the bottom drawer on each side.  It looks like it is two drawers, but it is actually just a deep drawer.  I use one side to hold 3-ring binders and the other side to hold the 10,000 pens I own!


I love the middle drawer too!  Its size is perfect for keeping my miscellanous supplies organized.


I have this cute little knick-knack I got from my "big sister" at school to keep my files clips in.


I love the color of my corner chair.  I bought it at "The Pink Porch" in Spring Hill, TN.  It was originally cream and I spray painted it this pretty blue color.  In the next month or two I'm going to construct a bookcase to house all the chaos in my office.  I'm thinking about making it this color but with a glaze.


My SIL made the pillow years ago.  She was going to toss it so I took it home.  It looks great in here!  The cute little hat on the corner of the chair is from my sister who is living in NYC right now!  I adored hers when we went ice-fishing a few years ago so she sent me one!! How sweet!!
You'll notice right now you only get to see one side of my office.  That is because the other side is a chaotic mess right now.  I have piles upon piles of school books and nowhere to keep them.  Once I finish my bookcase I'll post pictures of the rest of the room!

Have a great weekend!

Linking Here!

Friday, January 14, 2011

Uncrustable Delight!!

I'm working on my Mom's barstools this weekend, so I don't have any furniture projects just yet!


BUT I do have a little way to save some money!  I didn't come up with this on my own... I ran across it at Infarrantly Creative.

 I love Smucker's Uncrustables!  I'm always in a rush in the morning and it is so easy to grab one of these out of the freezer, some chips and go!


However, these run around $5 a box for only a few.  They're kind of expensive for something I could just make at home.  So I just make my own!

You Need:

One (or two) loaves of bread
Jelly of choice
Peanut Butter of choice (I like creamy!)
Knife
Pampered Chef Uncrustable thing

Skittles are optional! = )


Try to make these when your bread is fresh - if the bread is dry now it will be dry later. Yuck!

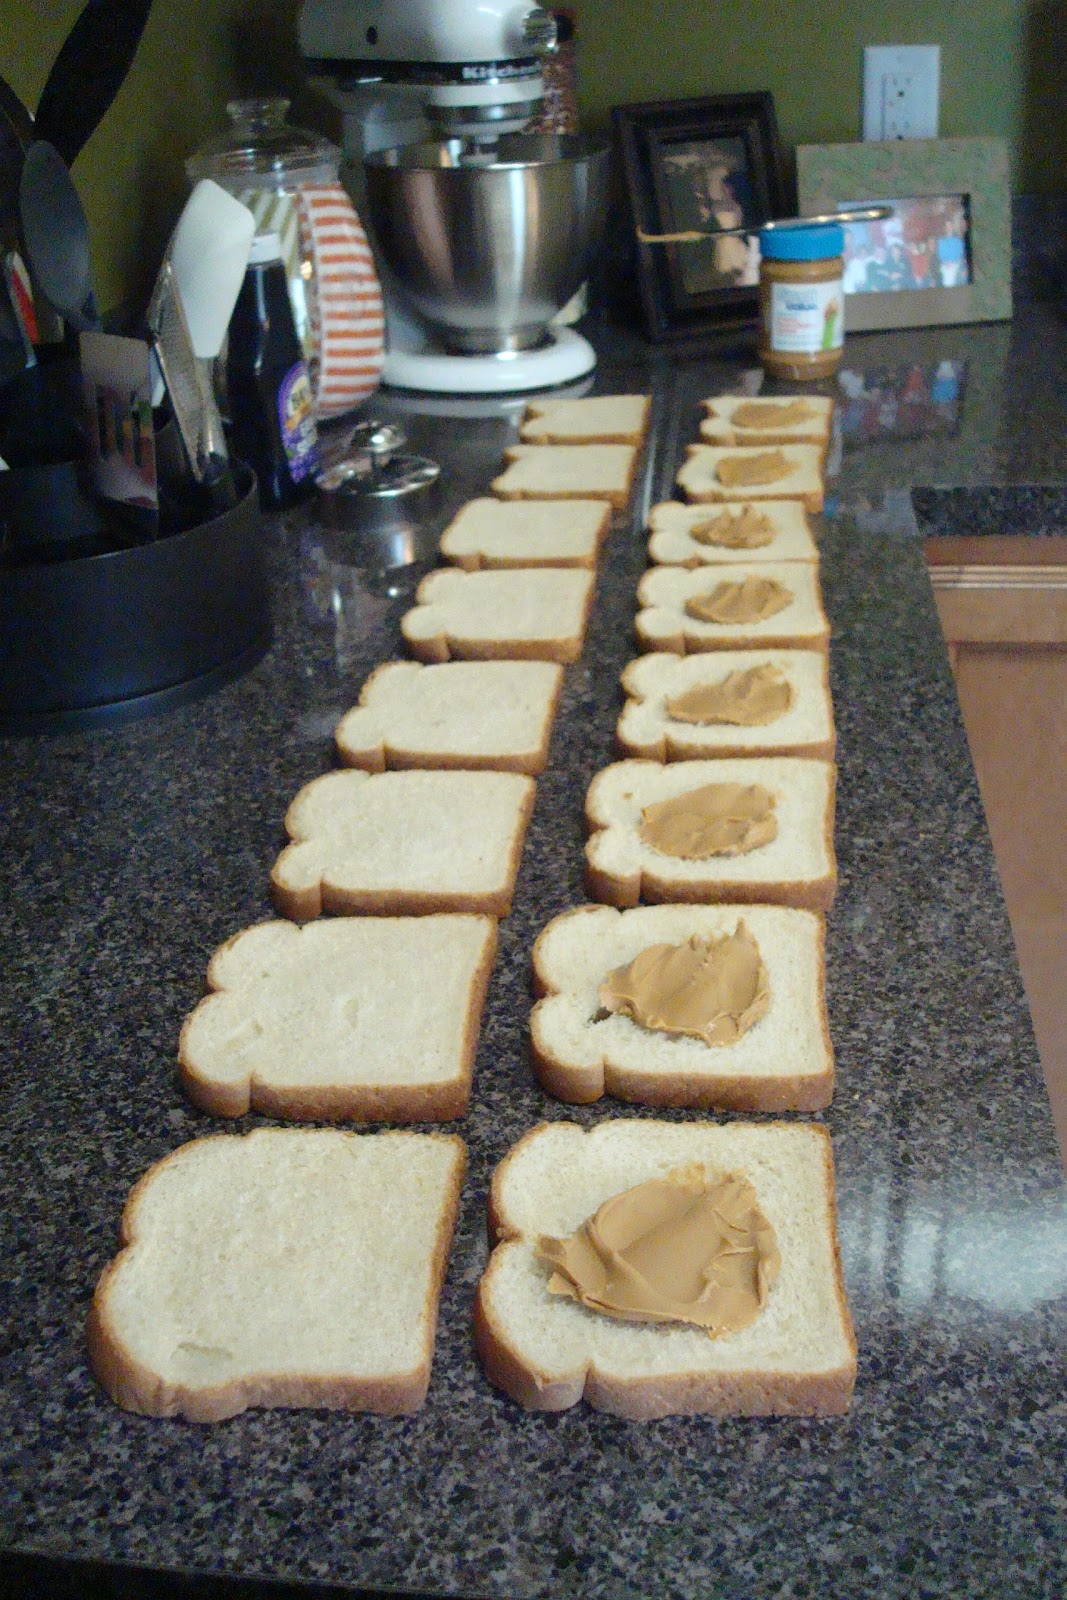
I spread the bread out in two rows.


Put about a tablespoon of peanut butter in the center of one row of bread.


Then glob on a little bit of jelly and smooth it out on top of the peanut butter.


Put the naked piece of bread on top of the peanut butter and jelly slice and gently press it down.


Now grab your Pampered chef uncrustable thingy and press it down in the middle of the sandwich.  It is important not to overfill the bread or you will have jelly and peanut butter leaking out everywhere.  While the uncrustable thing is still pressed down I peel off the excess bread.


Now you have eight happy little uncrustables.  This took me about ten minutes to make.  I still have over half the jar of peanut butter and about 3/4 of my jelly left.  A little goes a long way!


I put each one in an individual sandwich bag, then put all the individual bags into a gallon size bag.


Pop it in the freezer and now you have a yummy lunch on the go!


I despise crust, so when I'm finished I just throw all of mine away.  But you can cut all your crust into little squares, brush on some melted butter and seasoning, them pop them in the oven to make home-made croutons! See what Beckie did with her's!

I hope to be back next week with my Mom's barstool makeover!

Cheers!

Linking up to:

Tuesday, January 11, 2011

The Lady Gaga Collection


As promised, here are some photos of the bedside tables I finished for my SIL in her room.  Again, the lighting was pretty bad, but I did the best I could.  The collection started with this end table I did for the SIL for Christmas.


I jokingly call it her Lady Gaga corner because there is so much gold going on.  It looks really cute though.  I love the detail on this old Berkey and Gay table.


After she got her end table she decided to have her bedside tables done the same.  I was really bad and did not take any before pictures.  This shot of the broken leg is as close to a before as I have.


But you can imagine it looked similar to this before. (I found this image on the internet).


So here are a few snapshots of them in her room!  The first photo is of her husband's grandmother's table.  The second table she found at a flea market and it is very similar!


And here is one of my super cute neice!


The SIL seemed happy with them, so I'm happy too!

CHEERS!

Linking Here!

Monday, January 10, 2011

Bedside Tables Part 2


They're done!  I don't have fabulous pictures right now.  It snowed last night and the lighting outside is just dark and dreary!


After the primer dried I sanded the tables down real smooth.  Again, due to the gold color I had to use spray paint, so I would apply a coat, wait about 30 minutes, and apply another coat.  Here they are ready for a good glaze.


I used a cheap sponge brush to apply the glaze.  That works better for me than using a normal paint brush.  I don't put on globs of glaze, just enough so you can see it.


I normally use left over vegatable cans, but I didn't have any of those, so I  mixed my glaze in a cheap-o mixing bowl.  I use about 2/3 Valspar clear mixing glaze and 1/3 Valspar antique glaze.


I started with the legs, then moved to the top.  I glazed the entire piece at once.  After I had glazed the whole piece I started back at the legs again wiping the glaze off.


I used MiniWax wipe-on poly over the entire piece.  It was my first time using it and I have to say, I love it!  So much nicer than using a brush to apply it.  It goes on so smooth!


Now I'm just waiting for it to dry!  Tomorrow I'm going to take it over to the SIL's and see if I can get some photos of it with her decor! Hopefully the light will cooperate for me!