
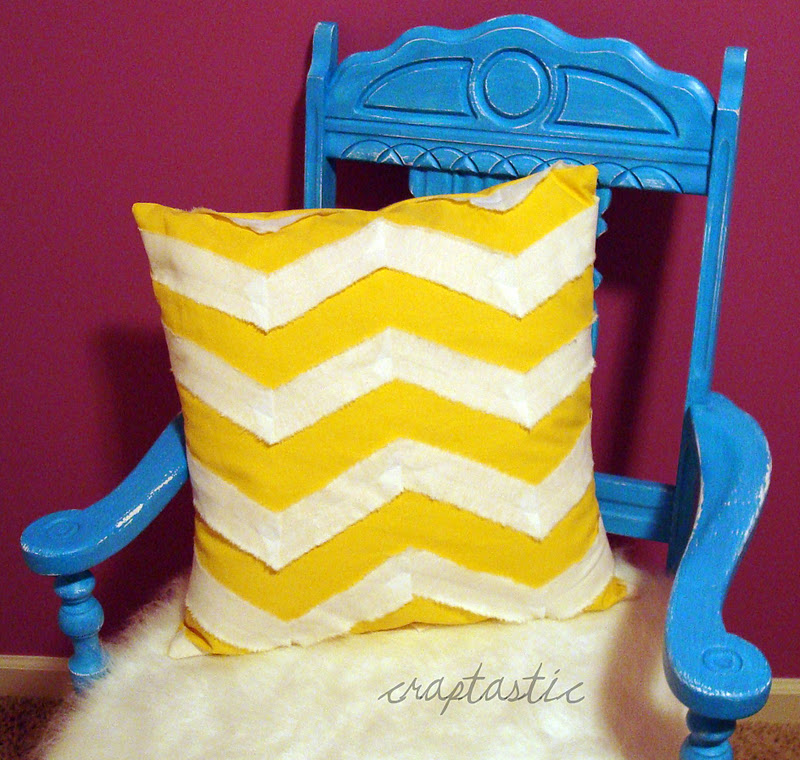
It's no secret that I love chevron. I took awhile to warm up to it, but now I can't get enough!
Unfortunately though, there is a severe lack of chevron fabric in the stores around here. I can find it online, but I'm not a huge fan of buying online and it can be expensive.
Solution? Make my own chevron fabric!
For an 18x18 pillow cover you need:
19x19 fabric for front
19x25 fabric for back
4, 1 3/4 inch strips in width of your fabric for stripes
Whenever I am working with stripes I like to rip my fabric, rather than cut it. I ripped four 1 3/4 inch wide strips out of a creamy colored linen. My main fabric is a yellow linen.
I apologize in advance for some of the blurry photos. The lighting in my house is real bad at night!

Start by spacing out your four strips at your desired distances and pin them in place.

Starting with the top strip, fold the fabric back on itself where you want the first point.

Using your finger to hold the fold in place, fold the fabric back in the original direction at an angle so it makes a diagonal crease.

This is the first point of your stripe. Pin it in place.

Continue this with your first strip until you reach the edge of the main fabric. You can make your stripes as wide or narrow as you want! I just wanted two points in my stripes.

Repeat this process for the rest of your stripes. You should have excess fabric on the edge. Cut this off and you can use it to fill in the small gaps at the top and bottom where a full strip won't fit.

Sew the strips on by sewing a straight line down the middle of the strip until you hit the point of the strip. Keeping your needle in the fabric, turn your pillowcase so you can sew a straight line down the next part of the strip. Do this for each stripe!
You know the rest of the drill. Make your envelope closure and you're done!


It's difficult to get a close photo of the detail, but I tried.
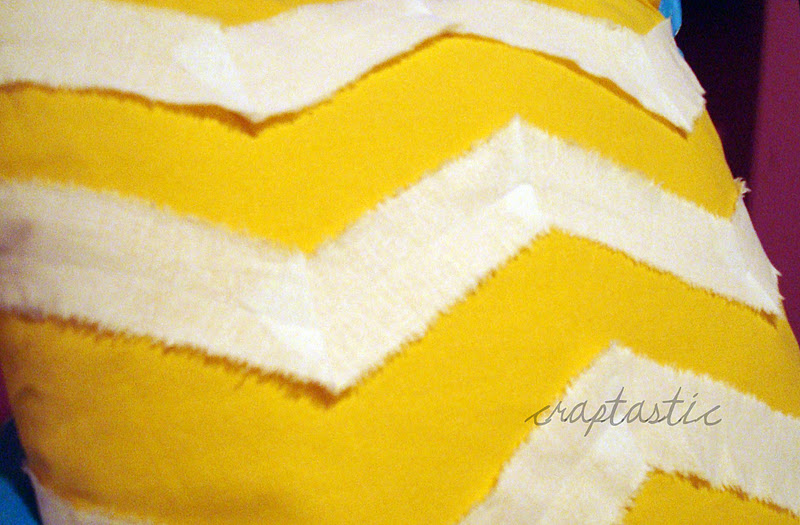
I love the texture of the linen!
I used 8 inches of the creamy linen, and about 1/2 yard of the yellow linen. I used my Jo-Ann coupon so this cost me about $5 to make!

I won't be doing a five feature friday this week. I just didn't get time to look around at everyone's projects!
Cheers!


you. are. awesome.
ReplyDeleteLOVE it, katie! happy weekend!
cute. cute. cute. and i love those owl ornaments, so original!!
ReplyDeleteso cute!! another great pillow that i'm gonna have to make!!!
ReplyDeleteSuper cute! I love the fuzzy edges ;-)
ReplyDeleteOh I so do love chevron and yellow and combine that on a pillow and you got me;)
ReplyDeleteThank`s for this tutorial, really great work!
And thank you for your lovely comment!
Your blog is really fun!!!
I`m your newest follower;)
Lovely greetings...
http://matsutakeblog.blogspot.com/
I love this pillow, I think I need to add this to my to-do list!
ReplyDeleteLove the pillow! And thanks for posting such a great tutorial! The step by step directions actually make me think I may be able to do this on my own!
ReplyDeleteThis is so great. I actually like it more than any fabric I have seen! very creative. I am chevron obsessed as well, I admit it!
ReplyDeleteMeredith From A Mother Seeking Come find me on my blog, A Mother Seeking...
So pretty and awesome tutorial, Katie! Love it! I'm warming up to chevron too. I'm always late to being trendy. lol
ReplyDeleteHave a wonderful week!
Great tutorial! I love it!
ReplyDeleteLove this and a great tutorial! Thanks for linking up at a Craft and Tell!
ReplyDeleteThis is so cute and a great tutorial! I would love for you to link up over at Totally Inspired Tuesdays going on now at The Inspired Collection.
ReplyDeleteKelli
www.theinspiredcollection.blogspot.com
awesome tutorial, awesome pillow, awesome chair, awesomeness! XOXO, Kate of avery&anderson.
ReplyDeleteLOVE THE PILLOW!! What colour did you paint the chair?
ReplyDeleteKatie, your pillow is SO cute, and your tutorial is awesome!
ReplyDeleteI featured this on my blog today:
http://christinasadventures.com/2011/11/sunday-features-48.html
And I pinned it too! :)
http://pinterest.com/christinasadven/20-below-features/
I love this! It looks so easy & that's just my style! Thank you for sharing! -Holly @ Bella Nest
ReplyDeleteGreat tutorial! Hopping over from www.gibmee.com
ReplyDelete色情視訊
ReplyDelete視訊驅動程式
視訊盒
大中華視訊網
avtv99視訊
免費視訊美女
後宮視訊
視訊錄影
mfc視訊
meme視訊