Image Map

Friday, September 30, 2011

Five Feature Friday #11!

Have you guys heard of the store Altar'd State?  I just discovered it this past week and I was in LOVE!  They have little birdie and owl trinkets all over the store.  They have clothes too, but I was more interested in the knick knacks.  See for yourself:


Sorry for the poor picture quality - I snapped these on the DL with my phone!  I took pictures because I plan on making these myself soon!  They were cute, but pricey.  It'll be much cheaper to make them myself!

I also made another Owl iPhone cover like this one!


This one is thicker and done nicer! I love it!

Soooo - onto the features!!

Photobucket

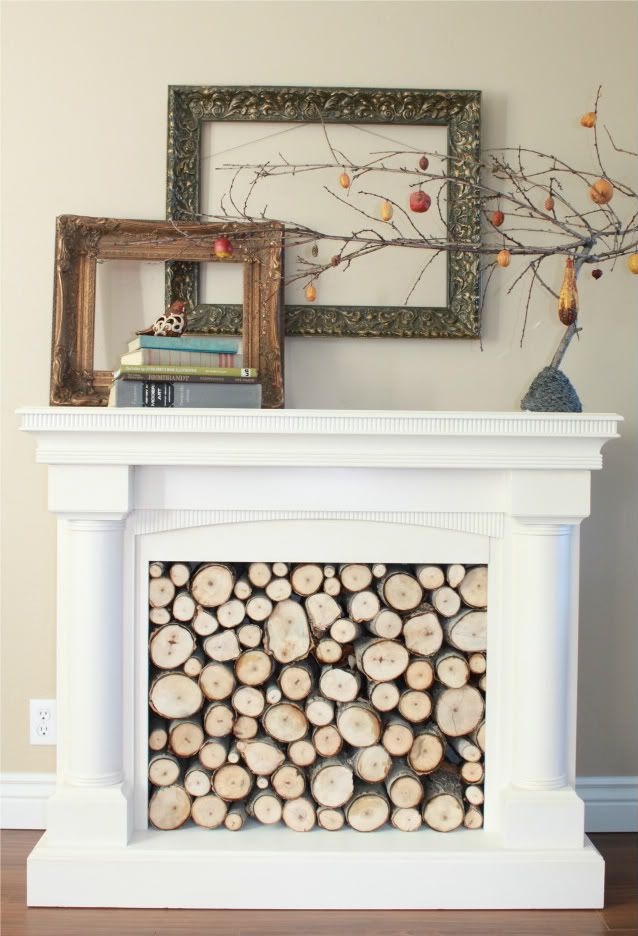
My jaw dropped when I saw this fireplace from The Rooster and The Hen.  All of the logs are from part of a tree they trimmed in the back yard.  LOVE THIS!


This retro birdie table from Embracing Change is so fun! I love the table style - the sweet little birdie just looks perfect on it! Not to mention that wonderful color!


life We Live 4 did such a great job on this buffet!  The color is gorgeous and the glaze makes the details look even better! I love how this turned out!


The polka dot letter on this pumpkin from A Lived In Home is so flipping cute! I'm crazy over polka dots right now, and it looks so cute on the pumpkin!
SANY0152

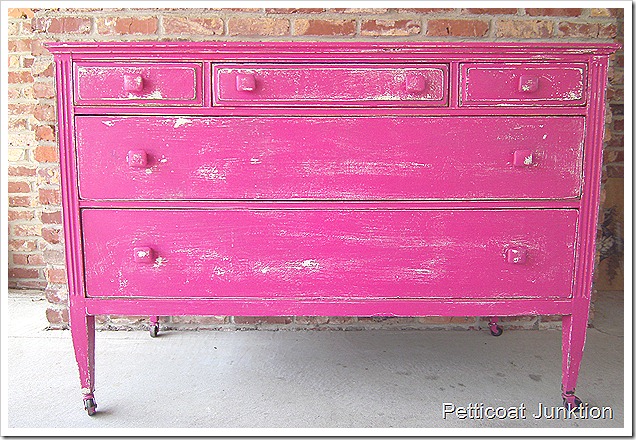
I'm drooling over this dresser from Petticoat Junktion!! It looks AMAZING with the white peeking through! Isn't this color so fun!

Hope you all enjoy your weekend!

Cheers!


Sunday, September 25, 2011

Acid Mirror for the Master Bedroom!


So, ever since I saw this awesome tutorial from Mandi @ Vintage Revivals I've been wanting to do an acid mirror.  I've seen them popping up and I love how they look!

A few months back I found an awesome ginormous mirror at an estate sale for $10.  Yes, please!

Here is how it looked before:


I busted out my paint remover and got started on the back.


Yeah, this is where things went terribly wrong.  I seriously think I used about 5-6 coats of paint remover in total.  While trying to remove the back, I cracked the mirror.  Awesome! The brand you see pictured really didn't do much for me so I went and bought a heavy duty paint remover.  It worked a little better but still didn't get all the back off.  Oh well!

While I was going through that ordeal I worked on painting the frame.  First I sanded, then primed, then painted it white.


After it dried I went over it with my Valspar antiquing glaze.  I love how it makes the detail pop.  I left it on pretty heavy.


After I removed as much of the back as I could I poured the acid straight on the back.  At first I didn't think it was working.  I sprayed it off with my hose and it had not changed at all, so I poured on some more acid.  I let it sit for about 5-10 minutes then checked it again.  It had worked more than I wanted it to.  Dang! Oh well!

I let it dry outside then cut my fabric to size.  I used my Elmer's spray glue to adhere the fabric to the back of the mirror.  Somehow during all of this another crack formed off the first crack I made.  Good thing I'm not the superstitious type! I got it all set up and hung on the wall and now I love it!


You can really see the cracks in this photo:

Here is a photo with just the lamps on - I love the ambience!


Here is a close-up of the frame and acid mirror - it is REAL hard to photograph a mirror.  There is always something reflecting in it and it distorts the image!


I've been wanting to do a project to go above the bed for a long time, so I'm glad to have it finished! I love it!!


Cheers!!
Keeping It SimpleDomestically SpeakingAnything RelatedTuesday To Do PartyPhotobucketmommahenscoopPhotobucketSomewhat Simple Catch a Glimpse ButtonTransformation ThursdayHookingupwithHoHfreckled laundryThe Shabby Nestbutton+FTF.jpgDesigner GardenUndertheTableandDreamingPhotobucketPhotobucket36th Avenue504 Main