Image Map

Saturday, April 9, 2011

Round Baby, Round Round!


Yay! I finished my Spring (and probably summer) wreath last night!  I love it!  Such a fun pop of color on the porch!

Here are the supplies:


I bought all of these from Joann Fabric!  The wreath was less than $3, the little 3-pack of H letters was around $1, and the seven 2inch strips of fabric were less than 25cents each, so around $1.75.

I already had the moss on hand from a previous project, but it is $5.99 at Hobby Lobby.


I chose a strip of fabric to represent each color of the rainbow except green, since the enitre wreath was green.  I also chose two more neutral fabrics with some color in them.


I followed this awesome rosette tutorial to make my seven rosettes.  Sorry, my hands were full and I didn't take any pics!  Here they are all finished!


Before I started gluing on the moss I spray painted my little H with Valspar's Exotic Sea.  I painted it the same color as my front porch chair so it would match!


Then I got started on the wreath.  I read on several blogs that the moss would stick better to the plastic, so I left it on.  I should have spray painted the wreath brown beforehand, but I was too impatient so I didn't! Next time maybe.  I would grab a chunk of moss, apply a generous amount of hot glue to the wreath, then press it on.  I always use lo-temp glue because I got a gnarly hot glue burn when I was little.

I didn't want to glue the rosettes directly to the moss cause I didn't think it would stick well.  So I grabbed my felt.  After I found the placement I liked on the wreath, I transferred the rosettes onto the felt and hot glued them on.


I cut off the excess felt and hot glued the three rosettes as the base.  Then I arranged the smaller rosettes into a pattern I liked and hot glued them to the larger rosettes.


I wanted to make sure the flowers wouldn't fall off (it's been really windy here) so I grabbed a few nails and pierced through the felt and the wreath.  Those bad boys are snug now! 

I thought about gluing the H onto the rosettes, but I liked it better on the ribbon.  The ribbon was left over from some pillows I made.  I cut about a 12inx2in strip and tied it around the top of the wreath!


I love! Now I just need to spray paint that ugly red hanger!  Knowing me though it will probably stay like that!


This is super messy:


And it's shedding pretty bad too:


I probably should have sprayed it with hairspray so it wouldn't shed as bad.  I might end up doing that later!  I still love it though!

Cheers!


Linking Here!!
freckled laundry

Friday, April 8, 2011

'Tis the Season...

For yardsaling that is!  I finally got to go this morning!  I suggested going in passing last night, and not only did the hubby not object, he kinda sounded excited about it!

Before I show you my treasures though, you get to see some of my flowers! I went to the most awesome flower store ever and bought some little beauties!  I want to buy a thousand more!


I can't remember if these are petunias or what.  Either way, I can't wait for them to completely bloom!  Check out those bizarre flowers on the left!  Aren't they the coolest things you've ever seen!


I love my big pot!  It's going to look awesome when everything is blooming!


My azalea on the front porch is going crazy!


I finally replaced my dead plant on the back porch too!  Hopefully it will grow pretty quicly.. it looks so little right now in comparison to the pot!


Now onto my yardsale treasures!

I found this little planter for $2! I love it as is:


Next I found some crazy cans.


WHAT? Who on earth would pay $1.50 for that? Not this girl! But, I did pay this:


Yes. That is $1 for a full bag of custom paint mix-paint cans!  Beats having to buy paint cans or save vegatable cans.  And I can re-seal these! Don't worry, they're perfectly clean on the inside!

Now this is my favorite.  I walked past it once without even seeing it.  As soon as I saw it I got real protective of it and made a bee-line for it.  It had to be mine.  I would have donkey-kicked someone over it!


Oh the possibilities!  Look at the sweet handle:


My favorite part?


Yeah buddy! This door is HEAVY and in great shape!  I can't wait to fix it up and put it somewhere!

Here is what I'm about to start working on:


Don't worry my friends! You'll get to see that tomorrow!  I know you can hardly stand yourself!

Cheers!

Monday, April 4, 2011

Fan-spanking-tastic Giveaway @ Christina's Adventures! (Closed)


Hey Folks!

I don't usually blog about other people's giveaways, but I absolutely adore this one from Christina @ Christina's Adventures!

Wanna know the awesomeness she is giving away?  Sure ya do!  I'll show ya!


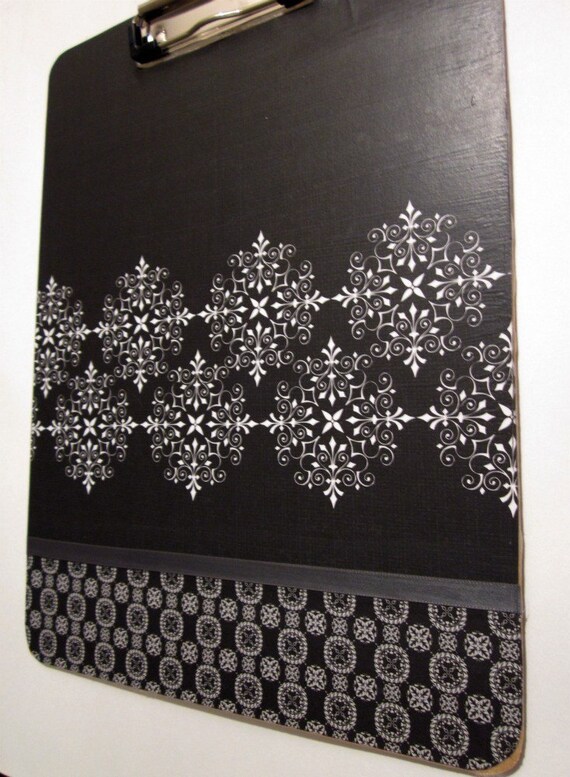
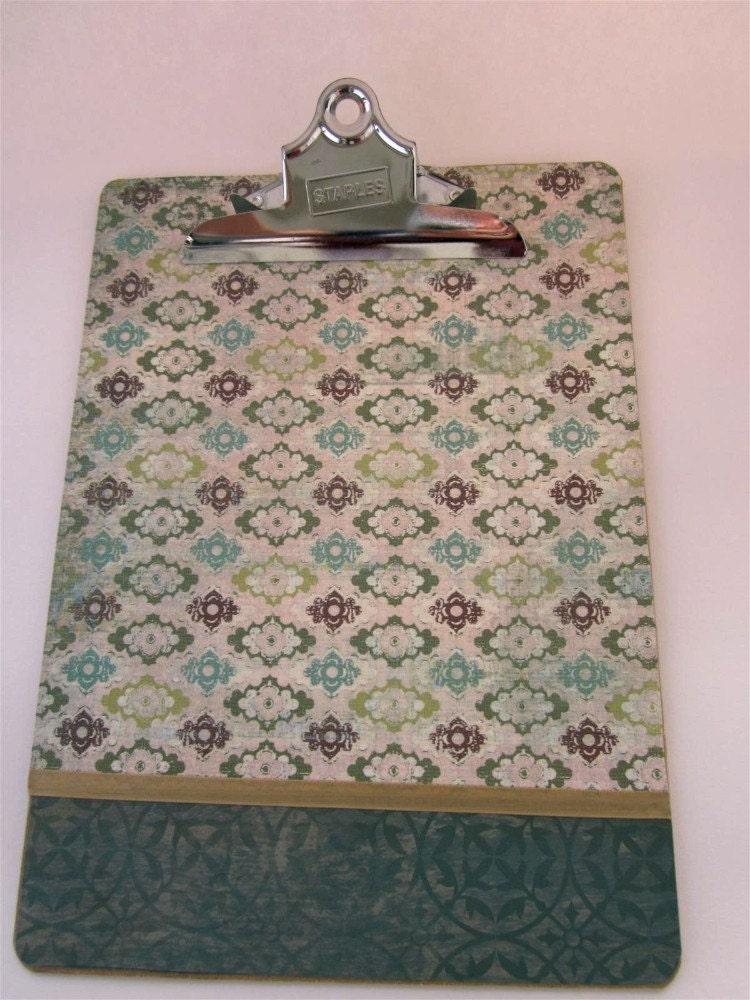
AAAAND you get a personalized clipboard from her, kinda like one of these:


Black & white border clipboard
Earth Tones

Yeah, I told you it was awesome!  Go check it out!  Good luck (but I want to win it)! =)

Cheers!

Saturday, April 2, 2011

Color My World!


Ok, so I can't really get those super cool professional shots with my archaic Sony cybershot, but my plants are blooming and I am ecstatic!!  It was finally warm enough this morning to have coffee on the back porch with the hubby!

After walking around the yard to inspect our plants we noticed they are all starting to bloom in full force!


My sweet little azalea finally opened up this morning!  We've had it for almost two weeks and it has had red buds since then.  I thought it would have opened up much sooner... it was a happy surprise this morning!!


It's got a lot of new growth too!  All the bright green leaves have grown since I planted it!


This is my favorite pot of flowers!  It sits at the top of our driveway by the garage... I peek at it every morning when I'm leaving for school!  I love how bright it is!


These little flowers were doing terrible for awhile.  Its very windy in our front yard, but they look great now!


Even the azaleas in the front are starting to fill out and become more green!


Cheers!

Friday, April 1, 2011

Ch- Ch- Changes!

I don't know why but I have that song in my head. If I've learned anything from all my projects, it is that almost nothing turns out exactly like I picture it in my head.  Case in point? My office chair.


My YELLOW office chair.  That was supposed to be my ORANGE office chair, like this sweet vanity from Cassie's daughter's room.

I knew it was time to redo this chair when I heard an awful CRACK! followed by a THUD! one night.  I ran into the office (this was in NY) to find hubby lying on the floor next to the top half of my chair.  After I wiped my tears of laughter and caught my breath, I saw the damage done to the chair.  The metal had come unwelded from the bottom and when the top of the chair cracked off it had made a huge gash in the seat and on one of the legs.

It used to be a pretty chair... originally purchased from Pier 1 about 8 years ago.


Hubby insisted on throwing it away, but I threw it in the garage knowing it could be fixed.  After we moved back to TN I had my Pa weld the top and bottom back together.  Just like new!  It was time for a new coat of paint though.  So over Spring Break I finally got to it.


At this point I was having serious doubts about whether the chair was worth all this trouble.  But I kept on.  There were a lot of nuts/bolts and screws for this chair, so I put them all in baggies with pictures so I would remember where to put them.


As I was using my Dremel to sand the whole thing down I heard a CRACK! followed by a CLINK!  Are you starting to notice a pattern here?  I looked down to find this:

SERIOUSLY?! Not happy!


After a few choice words I just kept on sanding.  A few nights later I moved inside to paint the chair at the same time I was painting The Pink Lady.  This is where the color issue became apparent.


I had bought a sample size of the sweetest little orange.  I noticed a lot of red around the rim of the container (you can kind of see it in the picture).  I think what happened is the red did not make it into the sample like it should have, hence the yellow, rather than orange color.  Oh well.  It'll match my cheap-o painting.

After the paint dried I moved it back out to the garage to glaze with my dark walnut Minwax and wipe on a coat of poly.


Here she is in her new home.  It may not be the sweet orange I wanted, but it is tons better than the old wood.


I also got to update my chalkboard!!  I was so anxious to update it I did it last week! =) 


Cheers!!

Linking to These Parties!!